Audio Software & Programming
Expert Sleepers Disting Quick Reference
The Expert Sleepers Disting is a multi-function Eurorack module that can play many roles. But all that versatility comes with a cost: every time I use it I find myself having to review the manual. And while the online manual is rather good, it's a pain to have to open a web browser to view it each time. So for easy reference i've put together a quick-reference PDF, linked below. Doesn't include the full detail, of course - just a summary of the feature selection.
Expert Sleepers Disting Quick Reference (pdf)
Eurorack Filter Demo: Doepfer A-108 Filter Sweeps
Having recently gotten into Eurorack modular synths (may the Eurorack gods have mercy on my checking account, and my wife on me), I recently bought a Doepfer A-108 filter. It's a "Moog-like" ladder filter with, I think, a great sound. More information: on ModularGrid.net, and on Doepfer's website. When trying to decide whether or not to buy it I noticed there weren't many demos available for this module (aside from the excellent demo by Andreas Krebs) so I decided to do a quick demo.
The filter sweeps were recorded using the saw wave output on an Intellijel Dixie II, through the A-108 (audio level set to '3' - or roughly "10:00 o-clock" on the pot so as not to distort), into an RME babyface, and recorded into Logic Pro X without any further processing. Five filter sweeps for each of the 5 outputs are recorded, each with different resonance settings (or "emphasis", as labeled on the module). Specifically:
- 6db, No Resonance
- 6db, 1/4 Resonance (knob at "9:00 o-clock", or '3' as labeled on the module)
- 6db, 1/2 Resonance (knob at "12:00 o-clock", or '5' as labeled on the module)
- 6db, 3/4 Resonance (knob at "3:00 o-clock", or '8' as labeled on the module)
- 6db, Full Resonance
- ...then the same five sweeps for the 12db output...
- ...then the 24db output...
- ...then the 48db output...
- ...and finally the band-pass output
Enjoy:
Evolving Melodies
In recent works i’ve had an interest in using the concept of evolution to help with composition. There’s a value in having alternatives presented to you, giving you ideas that you otherwise wouldn’t have thought of. Pure randomness is interesting, but tends to result in far too much variation - at least for my taste. What seems to be ideal is a tool that will vary musical ideas, but only slightly and gradually. This allows for variations on a theme rather than wholesale scrambling.
Enter evolution. Or at least a rough approximation of evolution.
What follows is a relatively simple Python program which can take midi files and create variations of the musical contents. It produces a set of files that are based on the original file, but vary in minor ways. For example: one pitch of a melody will be shifted up or down, notes will be split into two, note durations will be decreased or increased, etc. Disclaimer: I tried to model evolution with this software, but it’s not intended to be an accurate model. I deviated (some might say cheated) where I thought it would produce more interesting musical results.
My process so far has been to run this program once or twice a day, picking the variation that I prefer from those generated, and using it as the input to the next iteration. In a literal and evolutionary sense the user of the program is the ‘selection mechanism’. Each running of the program is somewhat like a ‘generation’ of offspring. Starting with a very basic melody (the same pitch repeated as quarter notes), each progressive ‘generation’ gets more and more diverse and interesting. The initial melodies are very very basic, almost unlistenable. But out of that monotony, gradually, you get some interesting musical ideas. The results are still dependent on my tastes (again, i’m the “selection mechanism”, choosing the variations I like best) and another person would get different results, but it’s unlikely that I would have created these melodies from scratch; doubtful these exact variations would have come to mind.
'Evolving Melodies' Source Code (right-click and "save as...")
Initial melody:
Fifth iteration:
Tenth iteration:
Final iteration (13th):
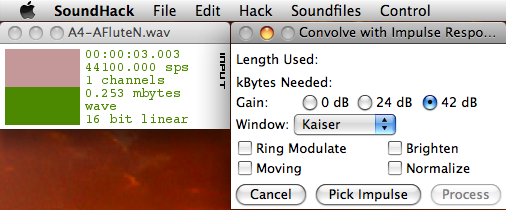
Easy Convolution with SoundHack.
SoundHack, a freeware program by Tom Erbe, has some terrific and unique functionality for manipulating sound - including convolution.
Convolution, a type of analysis-based sound file manipulation often used for reverb, can be used to generate some extremely interesting sounds by "cross-breeding" two source sound files. This can be done programatically with a number of music programming languages like CSound and Max/MSP, but SoundHack makes it quite easy (and free).